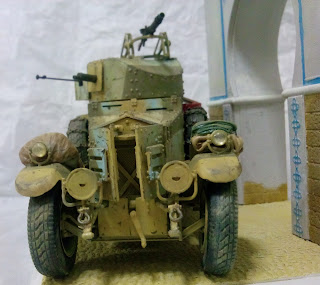
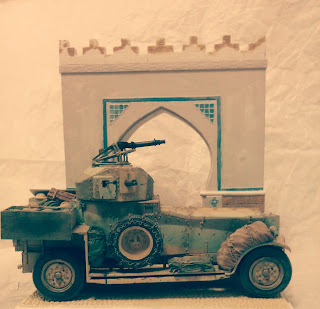
tonight a very interesting vehicle. A British vehicle that saw service during two wars, having almost 30 years of use in the Army, from the muddy flat lands of Northern France to the burning sands of Africa! Making the war driving a Rolls Royce, wow so chic! If it was not the terrible war...
This version produced by Roden is the 1920 version used in North Africa. It had large Sand Tyres, and an open turret with a Boy A/T gun, a machine gun and an AA machine gun on the roof of the turret.
It is not my intention to write the story of this well known vehicle , to the model! As always you will easily find information on internet. You also have interesting videos on YouTube.
About the kit!
It is a model that is not so bad, but some details are on the heavy side. There is a nice engine included but it's totally hidden, the visible dash board should have been more detailed! I was lucky enough to purchase the model at a model show in Belgium with a Black Dog set included for the price of the kit alone! It is a very nice addition to this simplistic kit! I would recommend it. I was also very lucky to have resin parts from a friend to improve the details and replace some parts from the kit by more delicate ones. (see pictures, grey parts).
The most time consuming was the sanding of the following parts 2d, 18d, 15a, 21 a, 14 a, 24a/25a, 13a, 32a, 16a, 12a. I used heavy duty sanding paper. If you don't sand the parts they will be far too thick! They would give the car the look of an armored car armored like a super heavy tank. Furthermore it will make the assembly of the model easier.
The part 1J has to be cut and sanded so that its edges come in contact with the sides of the turret. It is a very easy surgery!!! Also sanded the sides of the turret and added the lost rivets...You might want to add two reinforcement bars in front of the radiator, they have a shape of an X, but the bars meet on the low side of the X , not in the middle!!! See pictures and documents. I used Tamiya lenses cover for the main lenses and resicast lenses for the secondary lenses. The hooks are spare parts from Meng.
For the Caunter Scheme I used Tamiya acrylics and tape, the dust is from the weathering set from the same brand.
And finally...
in sepia...


No comments:
Post a Comment